【JavaWeb】mybatis基础
前言
记录学习JavaWeb课程中的部分知识点,包括maven依赖管理、maven高阶、Mybatis、SpringBoot自动配置等。本篇是关于mybatis的相关配置,以实现对数据的增删改查功能。
MyBatis增删改查
相关配置
- 准备数据库表emp,sql代码如下:
1 | create table user( |
- 创建一个新的springboot工程,选择引入对应的依赖,如mybatis、mysql驱动、lombok
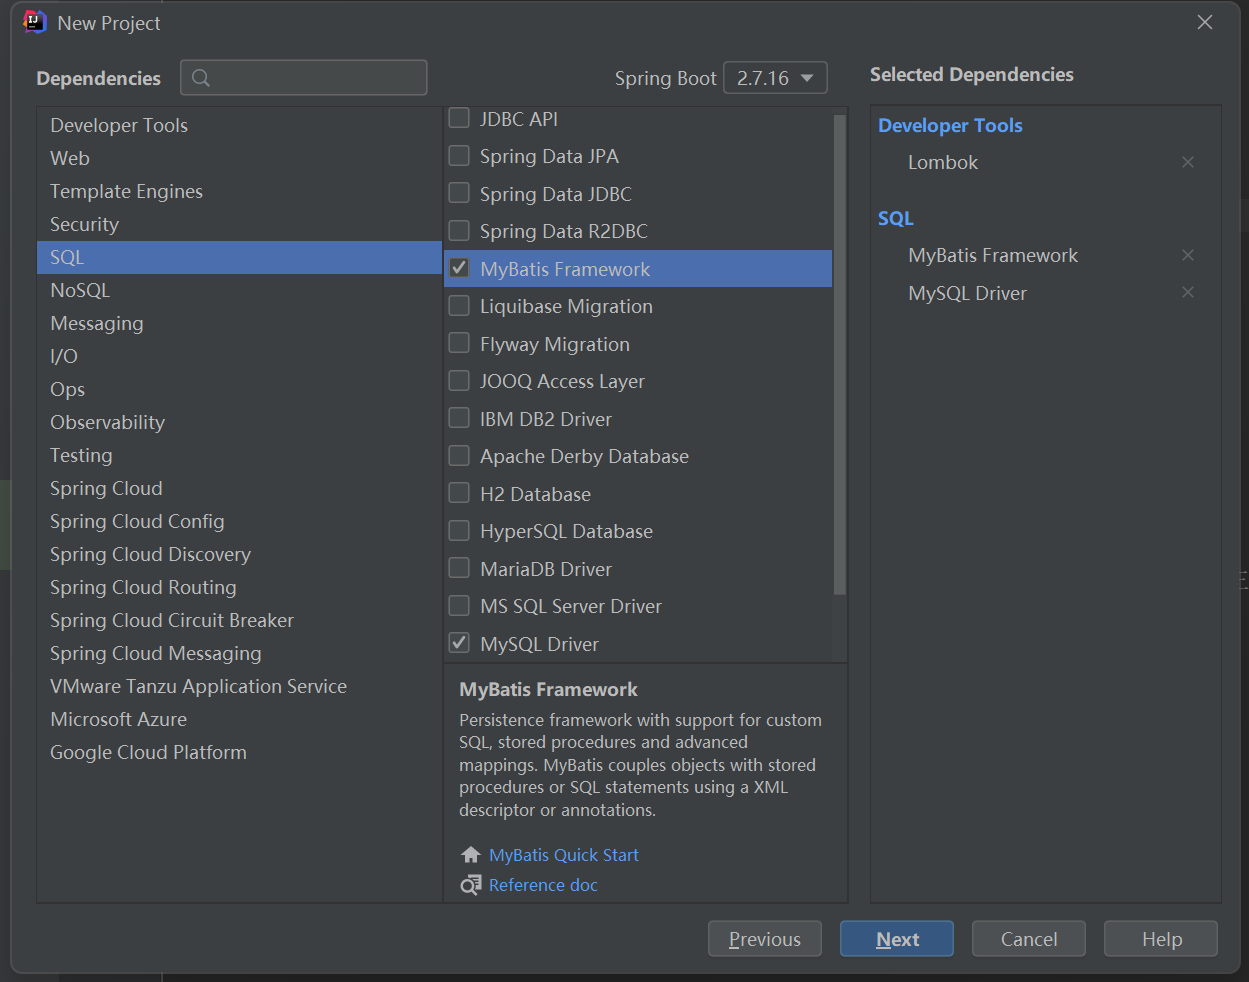
其实最方便的还是新建一个空的maven项目,直接把依赖配置粘贴上去(pom.xml)
1 |
|
- application.properties中引入数据库连接信息
1 | #配置数据库的连接信息 - 四要素 |
- 创建对应的实体类Emp(实体类属性采用驼峰命名)
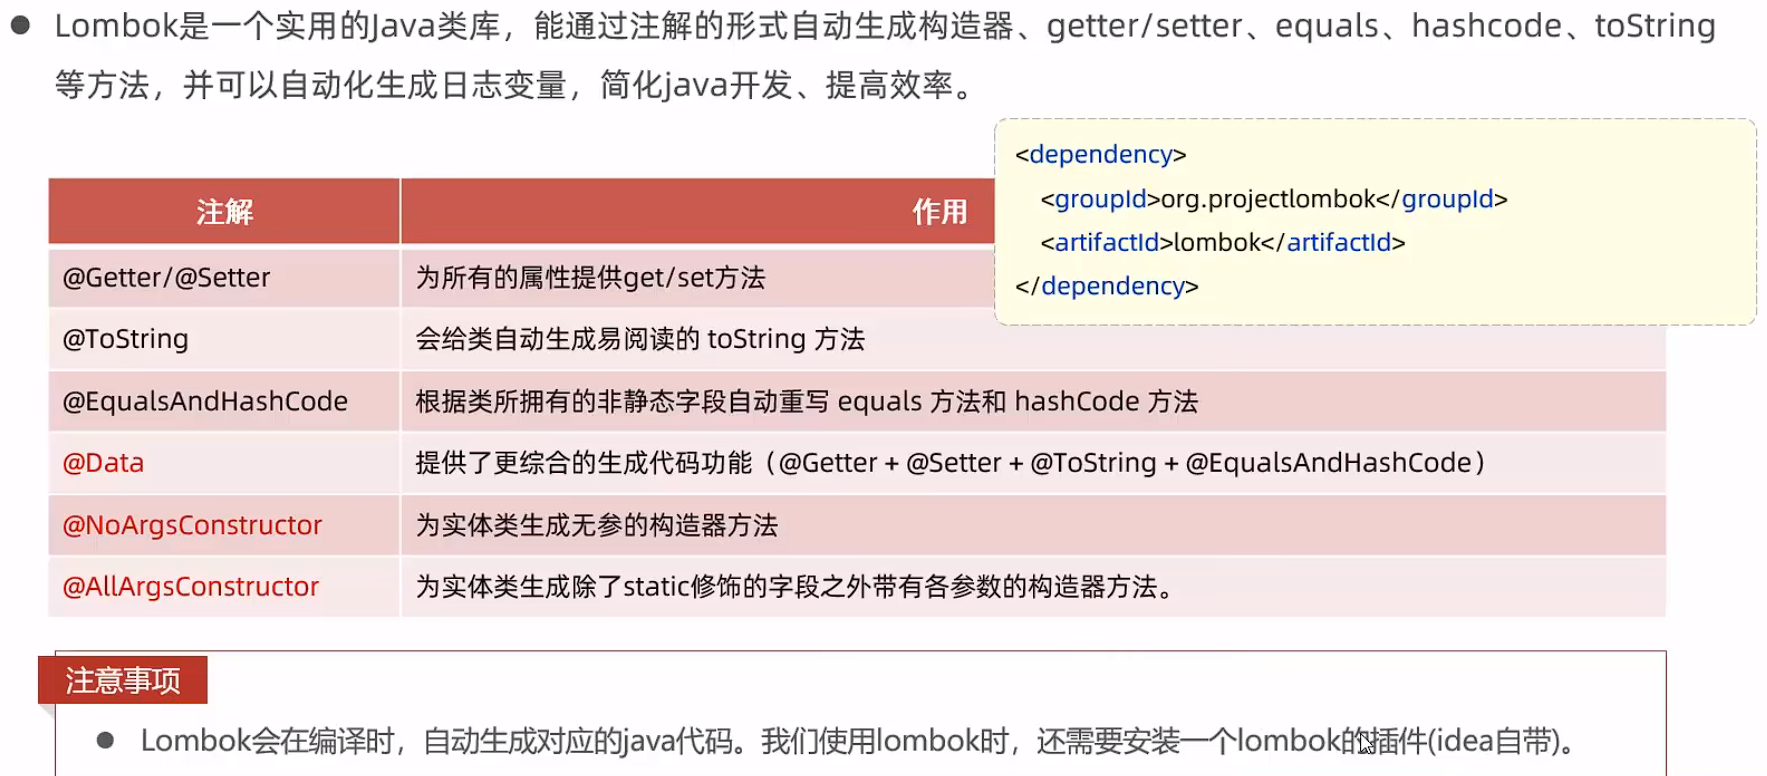
构造该实体类时使用了lombok中的@Data、@NoArgsConstructor及@AllArgsConstructor,简化了无参和带有各参数的构造,避免重复使用alt + insert生成。
1 | package com.itheima.pojo; |
- 准备Mapper接口 EmpMapper
1 | package com.itheima.mapper; |
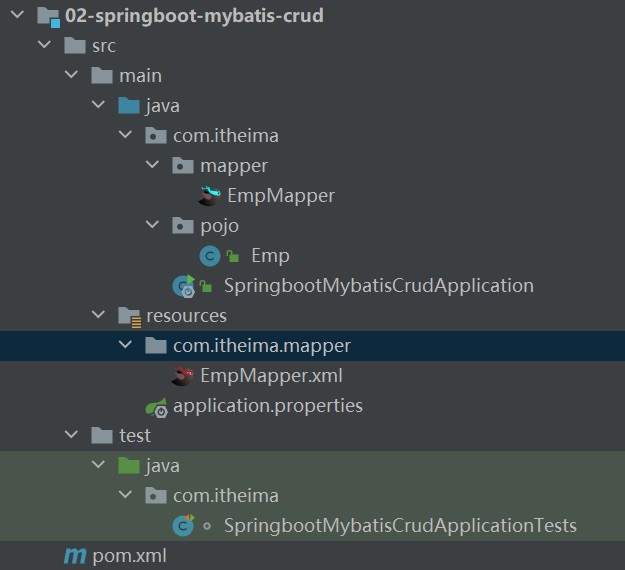
完成后的项目结构如下:
增加
emp表的内容如下:

如果需要新增数据,sql语句应为:
1 | insert into emp(username, name, gender, image, job, entrydate, dept_id, create_time, update_time) values ('songyuanqiao','宋远桥',1,'1.jpg',2,'2012-10-09',2,'2022-10-01 10:00:00','2022-10-01 10:00:00'); |
对应的接口方法为:
1 |
|
参数占位符
#{…}为MyBatis的参数占位符,还有一种形式为${…}。需要注意花括号中的名称是对象的属性名(采用驼峰命名),不是数据库中的字段名。
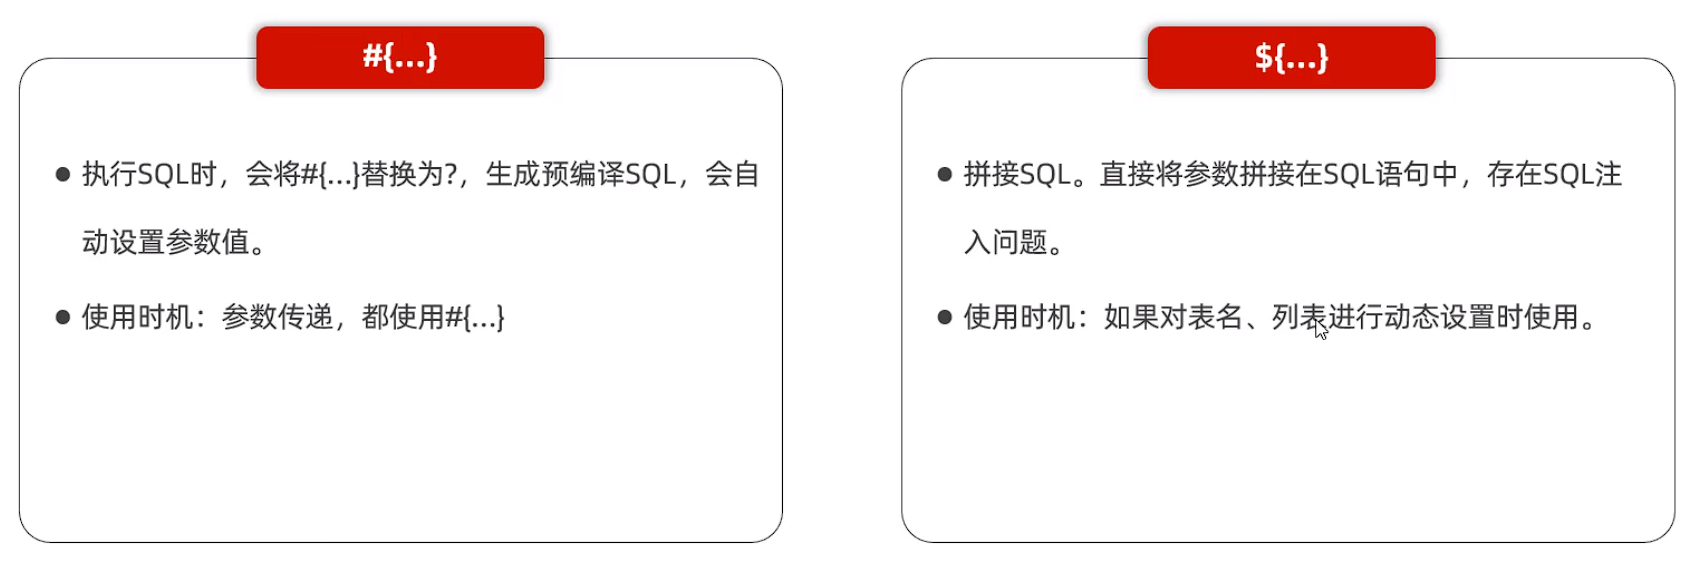
在项目开发中,建议使用#{…},生成预编译SQL,防止SQL注入安全。
预编译SQL
预编译SQL可以提升性能,将sql语句参数化,编译一次之后会将编译后的SQL语句缓存起来,可多次运行,不需要对相同的sql语句做重复编译。同时将敏感字进行转义,保障SQL的安全性。

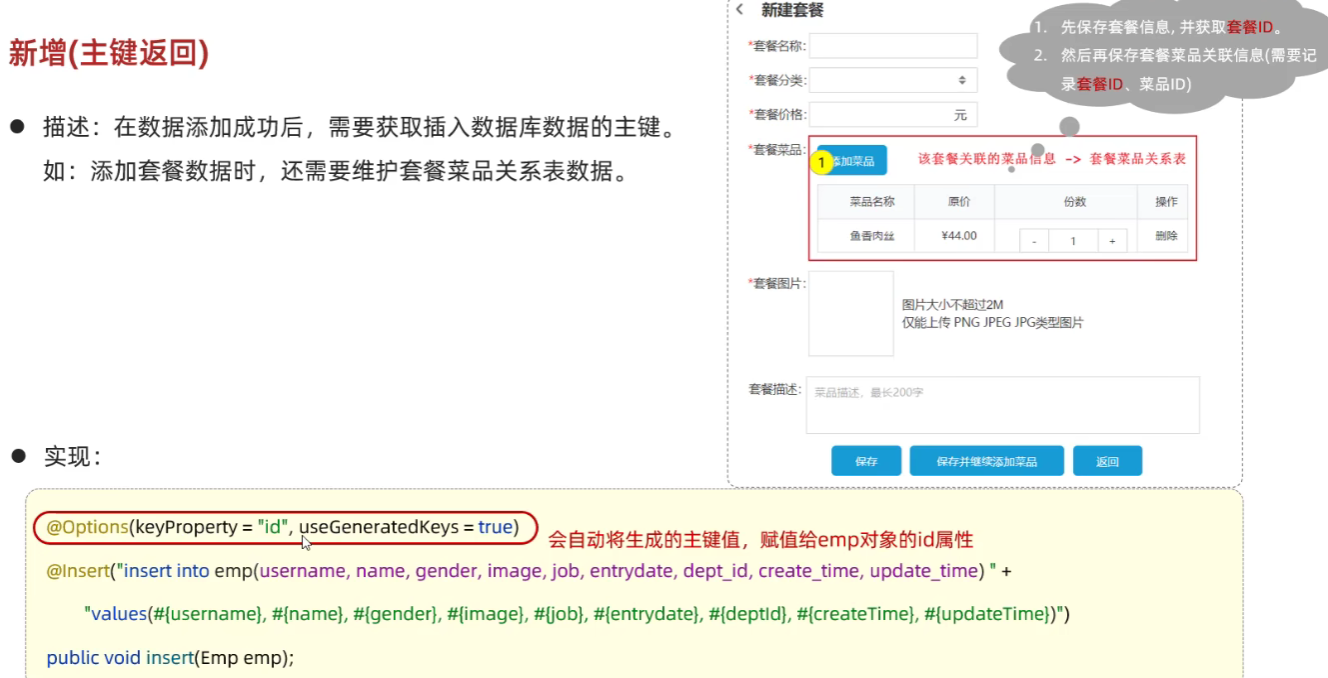
主键返回
如果需要在添加数据后,返回该数据对应数据表中的主键(id),只需要添加如下注解。
1 | //会自动将生成的主键值,赋值给emp对象的id属性 |
删除
根据主键删除数据,sql语句如下:
1 | delete from emp where id = 17; |
接口方法如下:
1 |
|
修改
根据主键修改数据,与增加数据的方式相同,sql语句如下:
1 | update emp set username = 'linghushaoxia', name = '令狐少侠', gender = 1 , image = '1.jpg' , job = 2, entrydate = '2012-01-01', dept_id = 2, update_time = '2022-10-01 12:12:12' where id = 18; |
接口方法如下:
1 |
|
查询
根据主键查询数据,sql语句如下:
1 | select id, username, password, name, gender, image, job, entrydate, dept_id, create_time, update_time from emp; |
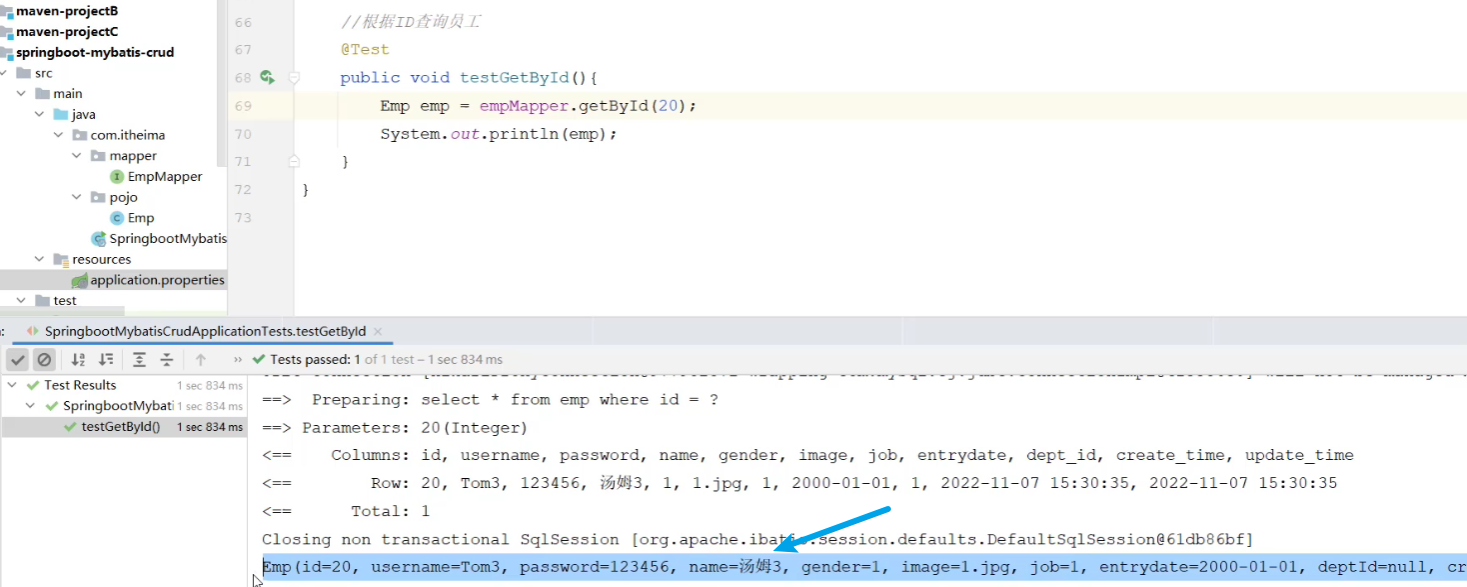
查询结果中的deptId、createTime、updateTime为空, 因为数据表中的字段与实体类中的属性名不一致,导致mybatis不能自动封装。
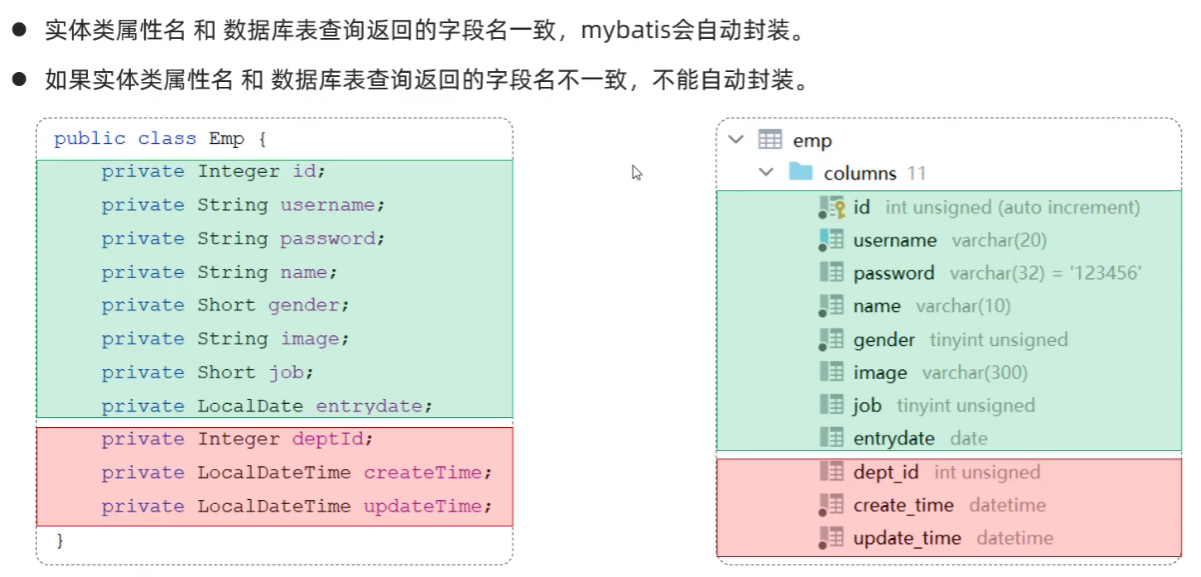
解决方案:
- 字段起别名

- @Results注解

- 开启mybatis驼峰命名法自动映射开关

条件查询
在实际使用中,我们可能需要根据姓名、性别、入职时间及最后修改时间多项条件对员工表进行模糊查询,
姓名:要求支持模糊匹配
性别:要求精确匹配
入职时间:要求进行范围查询
根据最后修改时间进行降序排序
可能使用的sql语句示例如下:
1 | select id, username, password, name, gender, image, job, entrydate, dept_id, create_time, update_time from emp |
对应两种可以使用的接口方法:
第一种(使用${…}进行字符串拼接):
1 |
|
该方法并不是预编译的形式,所以效率不高、且存在sql注入风险。
第二种(使用MySQL提供的字符串拼接函数concat):
1 |
|
函数:concat(’%’ , ‘关键字’ , ‘%’),此方法生成的SQL都是预编译的SQL语句(性能高、安全)

需要注意编写代码中的参数名规范,保证接口中方法的形参名和SQL语句中的参数占位符名相同。参数名在不同的SpringBoot版本中,处理方案也不同。

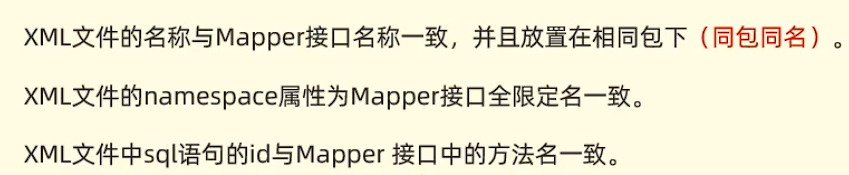
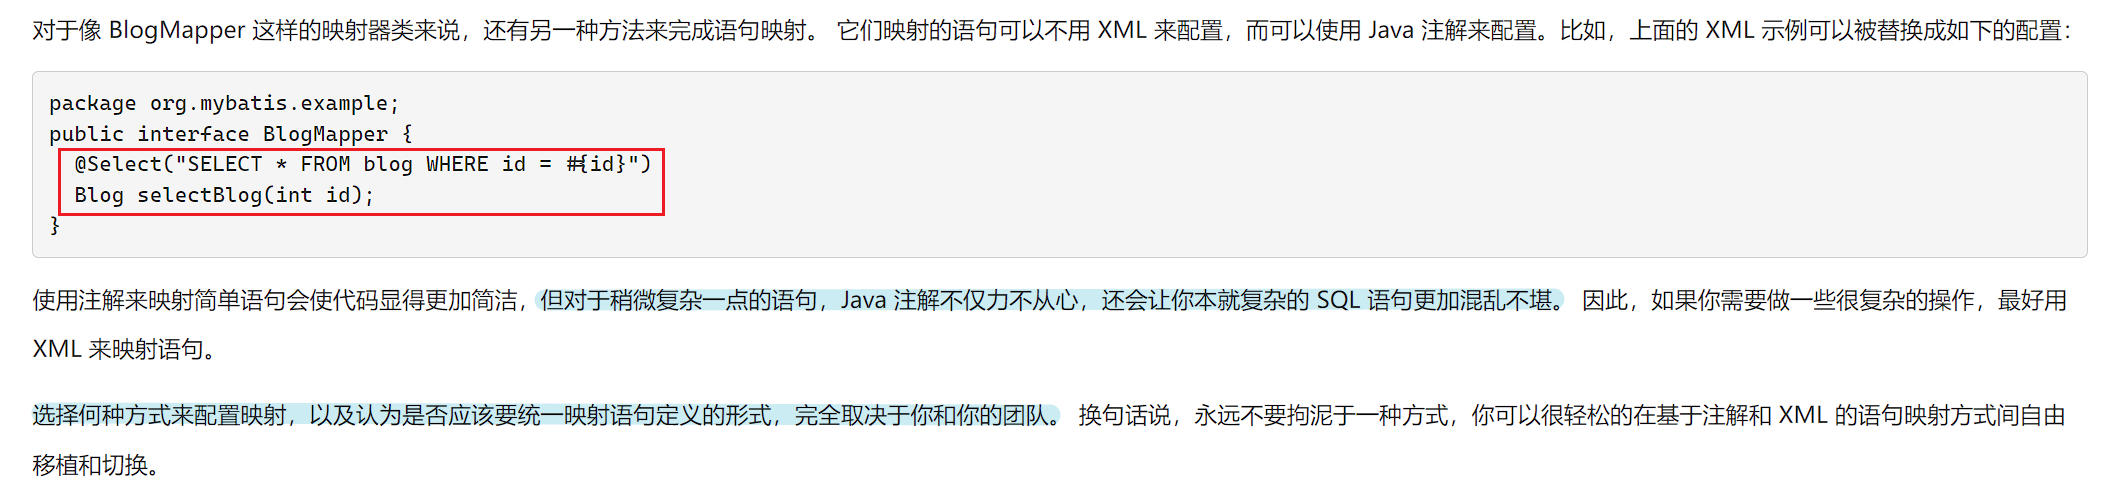
xml映射文件

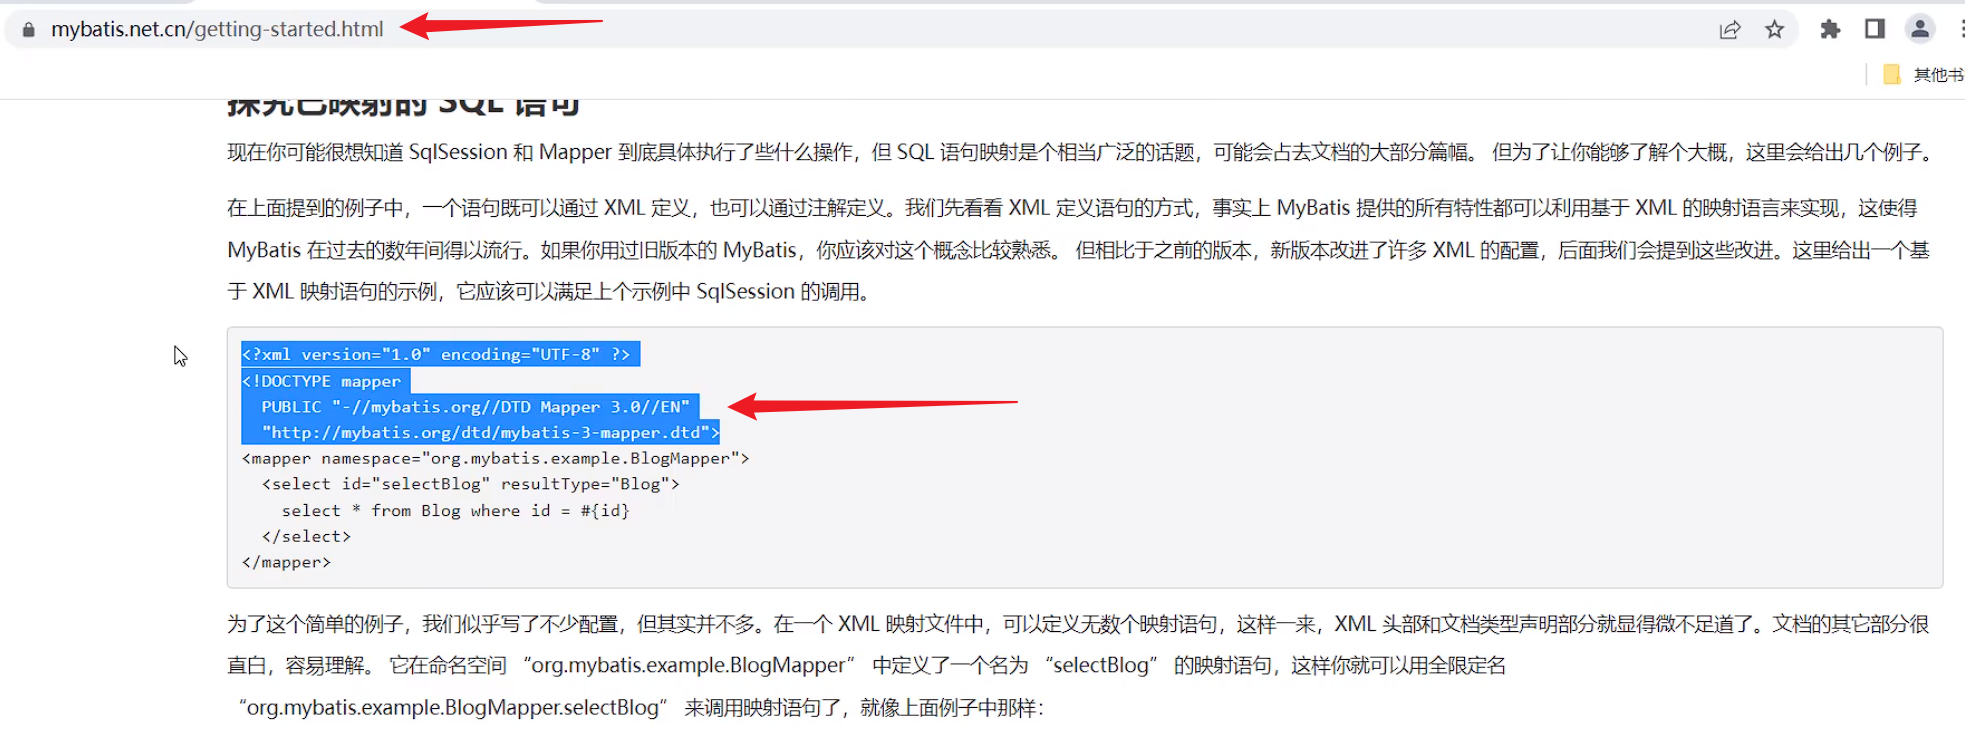
通过id(对应的方法)找到对应的sql语句 来完成数据库的操作
https://mybatis.net.cn/getting-started.html